Showing posts with label recipe. Show all posts

Friday, December 31, 2010

Holiday Rugelach


I've always seen these little crescent shaped cookies, but have never actually ate one, nor have I had any desire to make them. I've been nearly obsessed with Dorie Greenspan's cookbook lately and came across this recipe, and since it was right in the middle of the holiday season, I figured, why not!?

Rugelach, pronounced ru-ga-la, is a crescent shaped cookie that can be custom made according to your taste bud's preferences. The cream cheese dough can be wrapped around raisins, currants, chocolate, walnuts, pecans, hazelnuts, cinnamon sugar, and apricot or raspberry jam - omit or add ingredients as you desire!

The recipe in Dorie's book included currants, mini chocolate chips, jam, cinnamon sugar, and walnuts so that's what these have in them. I was skeptical at first; how was I supposed to roll this little piece of dough around all these ingredients, but it works! These cookies have so many different tastes, but all together, they're perfect for the holidays :)


Rugelach

Baking From My Home to Yours by Dorie Greenspan

Ingredients:

For the dough
4 ounces cold cream cheese, cut into 4 pieces (See Note below)
1 stick cold unsalted butter, cut into 4 pieces (See Note below)
1 cup all purpose flour
1/4 teaspoon salt

For the filling
2/3 cup raspberry jam, apricot jam or marmalade (I used apricot jam)
2 tablespoons sugar
1/2 teaspoon ground cinnamon
1/4 cup chopped nuts (pecans, walnuts or almonds) (I used walnuts)
1/4 cup plump, moist dried currants
4 ounces bittersweet chocolate, finely chopped, or 2/3 cup store-bought mini chocolate chips

For the glaze
1 large egg
1 teaspoon cold water
2 tablespoons sugar, preferably coarse sugar

Method:

For the dough
1) Let the cream cheese and butter rest on counter for 10 minutes. It should be slightly softened but cool.
2) Put the flour and salt in a food processor, scatter over the chunks of cream cheese and butter and pulse the machine for 6 to 10 times. Then process, scraping down the sides of the bowl often, just until the dough forms large curds. Do not work the dough too long that it forms a ball on the blade.
3) Remove the dough from the food processor, divide into half, shape each half into a disk, wrap in plastic wrap and then refrigerate for at least 2 hours, or up to a day. (Wrap airtight, the dough can be frozen for up to 2 months.)

To make the filling
1) Heat the jam in a saucepan over low heat, or microwave until it liquefies. Mix sugar and cinnamon together.
2) Line 2 baking sheets with parchment or silicone mats. (Silicone baking mats are great for rugelach.)

To shape the cookies
1) Pull one packet of dough from the refrigerator. If it is too firm to roll easily, leave it on the counter for about 10 minutes or give it a few bashes with your rolling pin.
2) On a lightly floured surface, roll the dough into an 11- to 12-inch circle. Spoon (or brush) a thin gloss of jam over the dough, and sprinkle over half of the cinnamon sugar.
3) Scatter over half of the nuts, half of the chopped chocolate and half of the currants. Cover the filling with a piece of wax paper and gently press the filling into the dough, then remove the paper and save it for the next batch.
4) Using a pizza wheel or a sharp knife, cut the dough into 16 wedges, or trigangles. (The easiest way to do this is to cut into quarters, then cut each quarters into 4 pieces.)
5) Starting at the base of each triangle, roll the dough up so that each triangle becomes a little crescent.
6) Arrange the roll-ups on one baking sheet, making sure the points are tucked under the cookies, and refrigerate for at least 30 minutes. (The cookies can be refrigerate overnight or frozen for up to 2 months; don't defrost before baking, just add a couple of minutes to the baking time.)

Getting ready to bake
1) Position the racks to divide the oven into thirds and preheat the oven to 350 degree F.

To glaze
1) Stir the egg and water together. Brush a bit of the glaze over each rugelach. Sprinkle the cookies with sugar.
2) Bake the cookies for 20 to 25 minutes, rotating the sheets from top to bottom and front to back at the midway point, until they are puffed and golden.
3) Transfer the cookies to racks to cool to just warm or to room temperature.


Andddd this would be the aftermath... my mom wasn't too thrilled when she saw her kitchen haha!

Saturday, December 18, 2010

Snowball Cookies

Every year my family makes the same Christmas cookies. And every year, we put them in the same Christmas containers. The same cookies, in the same containers. Every year. It's a tradition and we love our tradition!


These are (I think) my favorite cookie. They're melt in your mouth good, packed with chocolate, walnuts, and buttery goodness, and I'm positive they wouldn't taste nearly as good if it weren't the holiday season! They're great too because they yield so many, so they're perfect for giving away - which is by far the best reason to make holiday cookies :) I highly suggest making these, but before you get started, check your fridge and make sure you have 3 sticks of butter.

Mini Chip Snowball Cookies

  • 1 1/2 cups (3 sticks) butter or margarine, softened
  • 3/4 cup powdered sugar
  • 1 tablespoon vanilla extract
  • 1/2 teaspoon salt
  • 3 cups all-purpose flour
  • 2 cups (12-oz. pkg.) Nestle Toll House Semi-Sweet Chocolate Mini Morsels
  • 1/2 cup finely chopped nuts
  • Powdered sugar

PREHEAT oven to 375° F.

BEAT butter, sugar, vanilla extract and salt in large mixer bowl until creamy. Gradually beat in flour; stir in morsels and nuts. Shape level tablespoons of dough into 1 1/4-inch balls. Place on ungreased baking sheets.

BAKE for 10 to 12 minutes or until cookies are set and lightly browned. Remove from oven. Sift powdered sugar over hot cookies on baking sheets. Cool on baking sheets for 10 minutes; remove to wire racks to cool completely. Sprinkle with additional powdered sugar, if desired. Store in airtight containers (preferably your favorite holiday container).

Monday, December 13, 2010

Macadamia Triangles aka Triangle Squares

The first time I had this cookie was when Chris's mom made them. She announced them as "triangle squares."

"Triangle squares?" Chris asked. He was the only one who noticed what she had said was completely wrong. Instead, the rest of us were only concerned with consuming the gooey, delicious treat in front of our eyes.

Still to this day, we joke about the "triangle squares" and still to this day, I call them triangle squares. They are in fact called Macadamia Triangles, a recipe borrowed from Good Housekeeping and they are glorious.

I've never had macadamia nuts before having this treat, and I'm not quite sure I'd eat them by themselves, but mixed with brown sugar and a sweet pastry dough, they're amazing. Seriously. Want to try something different? Try this.

**A food processor is required (I only mention this because I'm not sure if everyone owns a food processor. I bet a blender would work though!)

Macadamia Triangles by Good Housekeeping

Sweet Pastry Crust

· 1 cup(s) all-purpose flour

· 1/4 cup(s) granulated sugar

· 1/8 teaspoon(s) salt

· 6 tablespoon(s) cold butter or margarine

· 3 tablespoon(s) cold water


Macadamia Filling

· 1 jar(s) (7-ounce) macadamia nuts

· 2/3 cup(s) packed light brown sugar

· 1 large egg

· 2 teaspoon(s) vanilla extract


Preheat oven to 425 degrees F. Grease 9" by 9" metal baking pan. Line pan with foil; grease foil.

Prepare Sweet Pastry Crust: In medium bowl, combine flour, sugar, and salt. With pastry blender or 2 knives used scissor-fashion, cut in butter until mixture resembles coarse crumbs. Sprinkle water, about 1 tablespoon at a time, into flour mixture, mixing lightly with fork after each addition until dough is just moist enough to hold together. With lightly floured hand, press dough evenly into bottom of prepared pan. With fork, prick dough in 1-inch intervals to prevent puffing and shrinking during baking.

Bake crust 15 to 20 minutes, until golden (crust may crack slightly during baking). Cool completely in pan on wire rack. Reset oven temperature to 375 degrees F.

Prepare Macadamia Filling: Coarsely chop 1/2 cup macadamia nuts; reserve for topping. In food processor with knife blade attached, process remaining macadamia nuts with brown sugar until nuts are finely ground. Add egg and vanilla. Pulse until just combined.

With small spatula, spread macadamia filling evenly over cooled crust. Sprinkle reserved chopped macadamia nuts on top. Bake 20 minutes, or until filling is set. Cool completely in pan on wire rack.

When cool, lift foil with pastry out of pan and place on cutting board; peel foil away from sides. Cut into 4 strips, then cut each strip crosswise into 4 squares. Cut each square diagonally in half. Store at room temperature, well-wrapped, up to 3 days.

Thursday, December 2, 2010

Chocolate-Crunched Caramel Tart

And again, Dorie Greenspan's book makes an appearance...

I sifted through the pages of Greenspan's book searching for the perfect dessert for Thanksgiving this year. I did made an apple pie (with a pretty green new dish I recently purchased), and brought along some ginger spice cookies, but I also wanted something chocolaty that I've never made before.


It was like love at first sight. The Chocolate-Crunched Caramel Tart. The picture in the book looked like I should take a fork to the page and eat the entire thing. So it was settled. I was going to make this tart, with my new pan, from the crust up.

Making the crust isn't easy. It takes patience, and is worth it. I dedicated an entire post to making the crust alone for first timers like myself. If you're an experienced crust-maker, you can skip over this post :)

I wasn't around when the tart was first cut into, but my family says the caramel layer was very hard, almost too hard to eat. It's supposed to be eaten at room temperature, which it was, so I found it odd that it was so tough.

However, the next day when I went to have myself a piece, it was fine! It was kept in the fridge and I actually enjoyed it cold. The caramel layer was chewy, but not too hard to eat. The flavors of the chocolate, caramel, and peanuts came together so well, almost like a candy bar. I will definitely make this again.


And after all my blabbering, here's the recipe!

Chocolate-Crunched Caramel Tart
Baking From My Home to Yours by Dorie Greenspan

For the caramel :

scant 1/2 c heavy cream

1/2 cup sugar, sifted

1 T light corn syrup

2 T salted butter, cut into 4 pieces, at room temperature

Pinch of salt if you are not using salted butter

For the ganache:

8 oz bittersweet chocolate, finely chopped

1 cup plus 2 T heavy cream

1/2 stick (4 T) unsalted butter, cut into 4 pieces, at room temperature

3/4 c honey-roasted peanuts, coarsely chopped

1 9-inch tart shell, fully baked and cooled


Getting ready: Because you have to work quickly once the sugar caramelizes, you should have all the ingredients for the caramel measured out and at hand before you start. Also have a medium heatproof bowl at hand to hold the hot caramel.

To make the caramel: Bring the heavy cream to a boil.

Meanwhile, put a medium skillet, preferably nonstick, over medium heat and sprinkle in about 3 T of the sugar. When it melts, stir it with a wooden spatula or a fork and sprinkle over another 3 T. When that sugar is melted, add the remaining 2 T sugar — the sugar in the pan may already have started to color, and that’s fine. Stir in the corn syrup and boil the syrup until it reaches a deep caramel color — it will probably begin to smoke, and that’s normal.

Stand back from the skillet and stir in the butter and salt, if you’re using it. The caramel will bubble furiously and may spatter, so make sure you’re away from the action. When the butter is in, add the warm cream — the caramel will bubble furiously again. Lower the temperature just a tad and let the caramel boil for just 2 minutes. (If you want to check on a thermometer, the caramel should be at 226 degrees F.).

Pour the seething caramel into the heatproof bowl and set it aside while you make the ganache.

To make the ganache: Put the chopped chocolate in a heatproof bowl and have a whisk or a rubber spatula at hand.

Bring the cream to a boil, then pour half of it over the chocolate and let it sit for 30 seconds. Working with the whisk or spatula, very gently stir the chocolate and cream together in small circles, starting at the center of the bowl and working your way out in increasingly larger concentric circles. Pour in the remainder of the cream and blend it into the chocolate, using the same circular motion. When the ganache is smooth and shiny, stir in the butter piece by piece. Don’t stir the ganache any more than you must to blend the ingredients — the less you work it, the darker, smoother and shinier it will be.

Cover the ganache with a piece of plastic wrap, pressing the plastic against the surface of the chocolate to create an airtight seal. Set aside at room temperature for the moment. (If it’s more convenient, the ganache can be refrigerated or even frozen for future use.)

To assemble the tart: Using a small rubber spatula, stir the peanuts into the caramel. If the caramel has cooled and is too thick to spread easily, gently warm it in a microwave oven using 3-second heat spurts. (Or you can just hold the heatproof bowl about 10 inches above the burner on your range — keep it over the heat for a couple of seconds, then check the caramel’s consistency and repeat if necessary.)

Spread the caramel over the bottom of the tart shell; you’ll have a thin layer. refrigerate the tart for 15 minutes to set the caramel.

Check the ganache. If it has thickened and is no longer pourable, warm it in 3-second spurts in a microwave oven or over direct heat (see the hints for warming caramel, above). Rap the bowl to break any surface bubbles, pour the ganache over the caramel and jiggle the tart pan to even it.

Refrigerate the tart for 30 minutes — no longer — then keep it at room temperature until serving time.

Wednesday, December 1, 2010

First Time For Everything


Third Time's a Charm

As a new member of the food blogging society, there are certain things I notice and look for when reading other blogs. I like to search the web for new recipes to try and tend to lean more toward recipes from personal blogs. I like these because the blogger usually gives more description about the recipe than a big-name website would. One thing I would like to see more of though -admitting mistakes or mess-ups. I know, from experience, not everything comes out the way you plan - in baking and in life. No one is perfect.

So let me start off by saying that it took me 3 tries to get this tart crust right. Three times! The first time, the dough seemed way too dry with only one large egg yolk, so I added another. And then when it still seemed too dry, I added another. Bad idea. It was too yolky and yellow and I knew it was going to lose it's flaky texture. Basura!

So I started fresh. Pulsed all the ingredients together in the food processor with only 1 egg yolk this time. But again, it was too dry for me to form into a dough! So I added a few tablespoons of water. Awful idea. The dough was too wet and sticky, and again, I knew it was going to lose it's flaky texture.


For the third and last time, all ingredients went into the food processor, no more, no less. I didn't care how dry it was, I was going to make it into a dough. So I poured it onto a lightly floured counter top and kneaded it so that all the dry ingredients were incorporated. I gently pressed it into the pan and baked it with no problems.

The trick with this crust is, that when you knead it on the counter, you are supposed to use your hands to incorporate all the dry ingredients in so they combine with the wet ingredients. It works. Don't panic. Your patience is well worth it because this crust really is delicious.

Sweet Tart Dough
Baking From My Home to Yours by Dorie Greenspan

1 1/2 cups all-purpose flour

1/2 cup confectioners' sugar

1/4 teaspoon salt

1 stick plus 1 tablespoon (4 1/2 ounces) very cold (or frozen) unsalted butter, cut into small pieces

1 large egg yolk

To make the dough: Put the flour, confectioners' sugar and salt in the workbowl of a food processor and pulse a couple of times to combine. Scatter the pieces of butter over the dry ingredients and pulse until the butter is cut in coarsely - you'll have pieces the size of oatmeal flakes and pea-size pieces and that's just fine. Stir the egg, just to break it up, and add it a little at a time, pulsing after each addition. When the egg is in, process in long pulses - about 10 seconds each - until the dough, which will look granular soon after the egg is added, forms clumps and curds. Just before your reaches this clumpy stage, the sound of the machine working the dough will change - heads up. Turn the dough out onto a work surface.

Very lightly and sparingly - make that very, very lightly and sparingly - knead the dough just to incorporate any dry ingredients that might have escaped mixing.

If you want to press the dough into a tart pan, now is the time to do it.

[If you want to chill the dough and roll it out later (doable, but fussier than pressing), gather the dough into a ball (you might have to use a little more pressure than you used to mix in dry bits, because you do want the ball to be just this side of cohesive), flatten it into a disk, wrap it well and chill it for at least 2 hours or for up to 1 day.]

To make a press-in crust: Butter the tart pan and press the dough evenly along the bottom and up the sides of the pan. Don't be stingy - you want a crust with a little heft because you want to be able to both taste and feel it. Also, don't be too heavy-handed - you want to press the crust in so that the pieces cling to one another and knit together when baked, but you don't want to press so hard that the crust loses its crumbly shortbreadish texture. Freeze the crust for at least 30 minutes, preferably longer, before baking.

To partially bake the crust: Center a rack in the oven and preheat the oven to 375 degrees F. Butter the shiny side of a piece of aluminum foil and fit the foil tightly against the crust. Bake the crust 25 minutes, then carefully remove the foil. If the crust has puffed, press it down gently with the back of a spoon. Bake for another 3 to 5 minutes, then transfer the crust to a cooling rack; keep it in its pan.

Sunday, November 28, 2010

Sugar-Topped Molasses Spice Cookies

I've been trying to make as many desserts from this cookbook I borrowed from my boss before I have to give it back - but hopefully Santa will return it to me for future baking :)

This past week I made the sugar-topped molasses spice cookies, mainly because they looked delicious, seemed easy, and I had extra molasses in the cabinet from the Bohemian wedding cake I made a few weeks ago.

I highly recommend these cookies for anyone who likes a cookie with a kick. I was intrigued by the use of pepper in them, which I've never used in a cookie before, but an a big fan of now! These cookies are almost like a gingerbread cookie, only more crunchy and spicy. They're great for dunking in milk or with a giant mug of hot cocoa. Ohhhh winter....

Before I give the recipe though, I want to give all you wonderful bakers out there that might actually make these cookies a few tips.

1) Last minute, I realized I didn't have allspice, so handy-dandy Google allowed me to look up a substitute (which I use a lot when I don't have a certain ingredient on hand). Instead of allspice, I used a teaspoon of pumpkin pie spice.

2) Freeze the dough for as long as possible, and work quickly when you take it out. I found that the warmer the dough and my hands got, the more easily the dough stuck to the palms of my hands.

3) Don't flatten them too thin; they spread while baking. My cookies came out a bit too crunchy (but keeping them in an air-tight container keeps them soft, so if this happens to you, stick them in a container and keep a lid on it).

4) The recipe says to use the bottom of a glass to flatten them. This works if you have a glass with a big enough bottom, but unfortunately the bottom of my drinking glasses were tiny. So I used the bottom of my plastic measuring cup. I recommend glass because it sticks less, but if you have to use plastic, make sure you have enough sugar on the bottom to keep from sticking.

There you have it, a few minor problems I ran into, but hopefully none of you will! These cookies are reallly easy to make and so yummy. Enjoy!!

Sugar-Topped Molasses Spice Cookies

Baking From My Home to Yours by Dorie Greenspan

2 1/3 cups all-purpose flour
2 teaspoons baking soda
1/2 teaspoon salt
2 teaspoons ground ginger
1/2 teaspoon ground cinnamon
1/4 teaspoon ground allspice
pinch cracked or coarsely ground black pepper
3/4 cup unsalted butter, room temperature
1 cup light brown sugar
1/2 cup molasses (not blackstrap)
1 large egg
1/2 cup sugar, for rolling

Whisk together the flour, baking soda, salt, ginger, cinnamon, allspice and pepper.

Working with a stand mixer, preferably fitted with a paddle attachment, or with a hand mixer in a large bowl, beat the butter on medium speed until smooth and creamy. Add the brown sugar and molasses and beat for 2 minutes or so to blend, scraping down the sides of the bowl as needed. Add the egg and beat for 1 minute more. Reduce the mixer speed to low and add the dry ingredients, mixing until the flour and spices disappear. If some flour remains in the bottom of the bowl, to avoid over-beating the dough, mix in the last of the dry ingredients by hand with a rubber spatula. You'll have a smooth, very soft dough.

Divide the dough in half and wrap each piece in plastic wrap. Freeze for 30 minutes, or refrigerate for at least 1 hour. (The dough can be kept refrigerated for up to 4 days.)
Center a rack in the oven and preheat the oven to 350 degrees F.
Line two baking sheets with parchment or silicone mats.Put the sugar in a small bowl.

Working with one packet of dough at a time, divide it into 12 pieces, and roll each piece into a smooth ball between your palms. One by one, roll the balls around in the bowl of sugar , then place them on one of the baking sheets. Dip the bottom of a glass into the sugar and use it to press down on the cookies until they are between 1/4 and 1/2 inch thick.

Bake the cookies one sheet at a time for 12 to 14 minutes, or until the tops feel set to the touch. Remove the baking sheet from the oven and, if the cookies have spread and are touching, use the edge of a metal spatula to separate them while they are still hot.

Transfer the cookies to a rack to cool to room temperature. Repeat with the second batch of dough.Yield: about 24 fairly large cookies (I got a few more)

Storage: The cookies will keep for at least 1 week in the cookie jar. Wrapped airtight, they can be frozen for up to 2 months.

Monday, November 15, 2010

I Think I Found a Winner: Chocolate Chip Cookies

"My Best Chocolate Chip Cookies"

While babysitting my boss's kids last weekend, I came across a book shelf of cookbooks, so naturally I opened pretty much every one of them. I have a bit of ADD when it comes to looking through cookbooks, because really, if you're not looking for something specific, who wants to look through every recipe.

I got this chocolate chip cookie recipe from a book called Baking: From my home to yours by Dorie Greenspan, and which actually kept me flipping through every page - I found some yummy "must-try" desserts in here!

Moving on, here's the chocolate chip recipe I used for these cookies. I usually use the recipe right from the back of the Toll House chocolate chip bag, but I think I might actually like this recipe better :)

My Best Chocolate Chip Cookies

2 cups all-purpose flour
1 teaspoon salt
3/4 teaspoon baking soda
2 sticks unsalted butter, at room temperature
3/4 cup sugar (the recipe calls for 1 cup of sugar, and 2/3 cup of brown sugar, but I like to use more brown sugar than regular sugar)
1 cup packed brown sugar
2 teaspoons pure vanilla extract
2 large eggs
12 ounces bittersweet chocolate, chopped into chunks, or 2 cups store-bought chocolate chips or chunks
1 cup finely chopped walnuts

Preheat oven to 375 degrees F.

Whisk together the flour, salt and baking soda. Put aside.

With a mixer, beat the butter on medium speed for about 1 minute, until smooth. Add the sugars and beat for another 2 minutes or so, until well blended. Beat in the vanilla. Add the eggs one at a time, beating for 1 minute after each egg goes in. Reduce the mixer speed to low and add the dry ingredients in 3 portions, mixing only until each addition is incorporated.

Hand mix in the chocolate chips and nuts.

Spoon the dough by slightly rounded tablespoons onto the baking sheets, leaving about 2 inches between spoonfuls.

Bake for (the recipe calls for 10-12 minutes, but I needed less time) about 7-8 minutes, or until they are brown at the edges and golden at the center.

Let cool for about a minute and transfer them to a wire rack to cool.

Bon appetit!

ps: There's no way to really shape drop cookies like the heart-shaped one in the picture... I just added a little extra love :)

Monday, November 8, 2010

Bohemian Wedding Cake from EatLiveRun

I've been on a bit of a pumpkin kick lately and after coming across a pumpkin spice walnut cake on EatLiveRun's blog, I knew I had to try it. The cake, actually called a Bohemian Wedding Cake, mixes the flavors and textures of pumpkin, walnut, molasses, and spices that come together to form an incredibly moist, rich cake.

The pictures of this dessert just don't do it justice. This might be one of my favorite pumpkin desserts (even above the muffins!), however, one thing I would switch up is the frosting. I used the frosting that EatLiveRun uses, but to be honest, I don't think I let the cake cool enough before applying the frosting (there's me being impatient for ya!). Next time I make it, I might try making two cakes and spreading the a cream cheese frosting in the middle... mmm.


One thing I do love about this dessert is that you don't need a mixer! Just two bowls, some measuring utensils, a wisk, and a giant spoon.


First, mix together your dry ingredients:

Then your wet ingredients:

Then combine them both, mix in those walnuts, and plop it all into a baking pan. You can use whatever kind of pan you want... I used a bunt cake pan, but the blog I got the recipe from used a standard 9-inch cake pan.

I think I would vote this recipe #1 for easiest way to 'wow' family and friends on Thanksgiving. Don't think you can bake? Make this. If you can measure ingredients and mix a batter, you'll have yourself a delicious little dessert for the holidays.

Bohemian Wedding Cake

Dry Ingredients:

1 cup whole wheat flour

1 cup all purpose flour

1.5 tsp baking soda

2 tsp pumpkin pie spice

1/2 tsp salt

Wet Ingredients:

1 15-ounce can pumpkin

1 1/2 cups packed brown sugar

1 cup canola oil

2 eggs

1 tsp vanilla extract

1/4 cup molasses

1/2 cup (big handful) roughly chopped walnuts


Preheat your oven to 350 and butter/flour a nine inch cake pan. Set aside.

In a bowl, combine the dry ingredients (flours, pumpkin pie spice, salt and baking soda). Mix well.

In another bowl, whisk together the canola oil, eggs, pumpkin, molasses, brown sugar and vanilla. Add the dry ingredients and stir to combine.

Fold in the walnuts and then pour batter into prepared cake pan. Bake for about fifty minutes, or until the cake starts to pull away from sides of pan. Let cool for ten minutes and then invert on a plate and let cool all the way.

Frost as desired.

Thursday, October 21, 2010

Best Apple Pie Recipe

This apple pie is so simple to whip up and tastes delicious! The butter syrup mixture thickens on the stove to make a home-made caramel that gets poured over the crust. I love this pie because it never gets watery and the crust always has a perfect crunch. Perfect after-dinner dessert for those chilly autumn nights.

Trust me, you don't want to miss out on this...

"American" Apple Pie

Ingredients
1 package double pastry pie crust
1/2 cup unsalted butter
3 tablespoons all-purpose flour
1/2 cup white sugar
1/2 cup packed brown sugar
1/4 cup water
2 tbsp cinnamon
6 apples (Granny Smith are recommended)

Directions

Preheat oven to 425 degrees. Peel, slice, and core apples. Toss apples with the cinnamon.

Melt butter in a sauce pan. Stir in flour to thicken. Add white sugar, brown sugar and water; bring to a boil. Reduce temperature and simmer for 5 minutes.

Place the bottom crust in a 9" pie pan. Fill with apples. Cover with basket weave crust. Gently pour the sugar and butter syrup over the crust making sure to cover entire pie, but not drip off the edge.

Bake for 15 minutes at 425 degrees. Reduce the temperature to 350 degrees and continue baking for 35 to 45 minutes.

Pumpkin Spice Muffins with Cream Cheese Filling

I made Pumpkin Spice Muffins with Cream Cheese filling on Monday, determined to make something pumpkin to celebrate autumn. I found this recipe from a blog called Annie's Eats. These muffins were an absolute HIT with friends, family, and co-workers. They had a moist consistency and the sweet-spicy flavor of the pumpkin and cream cheese combo melt in your mouth. I must admit, they were quite tasty :)

This recipe is actually very easy, but takes a bit of time to prepare. As you'll read in the recipe below, you have to make the filling at least 2 hours in advance so it has time to harden in the freezer. I was surprised by how much filling there was, and decided to make two logs out of it, instead of just one (they were easier to manage this way). I snapped a few pictures along the way to show you how my little logs came out.

I actually left mine in the freezer for a good 24 hours before I actually got around to making the muffins. Hint: Don't take them out of the freezer until you're absolutely ready for them. The cream cheese softens quickly and gets messy.

The mix was crazy simple, just follow the directions below. Dry into wet, you know.

Now this is the secret part of the recipe... your friends and family will most definitely ask you how you got the cream cheese in there, but they don't need to know how incredibly simple it was. You can tell them you slaved over these muffins, stuffing them with cream cheese with just enough so that they didn't explode... you get the drift.

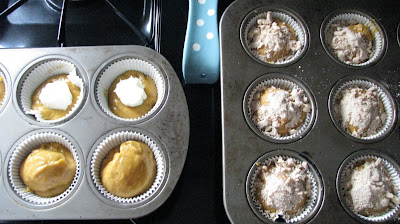
So get out your muffin tins, muffin cups, batter, cheese logs, and topping (which I didn't take a picture of, sorry!) and get to it. This is when you cut your logs up into 24 little pieces - use your best judgment with size. I just cut them about an inch long. Fill the cups with a little bit of batter, place a cream cheese piece in the center, cover her up with more batter, and top that little baby off some sugary goodness (the crumble topping).

There you have it! Now they're ready to be baked.

Warning: You may start to smell a heavenly sweet pumpkin aroma, but please, let them bake the full time and try to control yourself...

And this is what you will come out with :D

Pumpkin Cream Cheese Muffins

Yield: 24 muffins
Ingredients:
For the filling:
8 oz. cream cheese, softened
1 cup confectioners’ sugar

For the muffins:
3 cups all-purpose flour
1 tsp. ground cinnamon
1 tsp. ground nutmeg
1 tsp. ground cloves
1 tbsp. plus 1 tsp. pumpkin pie spice (I actually left this ingredient out because I didn't have any on hand, and substituted it with an extra tsp. each of cinnamon, nutmeg, and cloves)
1 tsp. salt
1 tsp. baking soda
4 large eggs
2 cups sugar
2 cups pumpkin puree
1¼ cups vegetable oil

For the topping:
½ cup sugar
5 tbsp. flour
1½ tsp. ground cinnamon
4 tbsp. cold unsalted butter, cut into pieces

Directions:
To prepare the filling, combine the cream cheese and confectioners’ sugar in a medium bowl and mix well until blended and smooth. Transfer the mixture to a piece of plastic wrap and shape into a log about 1½-inches in diameter (your logs will be messy and difficult to smooth into perfectly shaped logs. Don't worry, they go inside the muffin and no one will see them. Just make sure they're log-like). Smooth the plastic wrap tightly around the log, and reinforce with a piece of foil. Transfer to the freezer and chill until at least slightly firm, at least 2 hours.

To make the muffins, preheat the oven to 350˚ F. Line muffin pans with paper liners. In a medium bowl, combine the flour, cinnamon, nutmeg, cloves, pumpkin pie spice, salt and baking soda; whisk to blend. In the bowl of an electric mixer combine the eggs, sugar, pumpkin puree and oil. Mix on medium-low speed until blended. With the mixer on low speed, add in the dry ingredients, mixing just until incorporated.

To make the topping, combine the sugar, flour and cinnamon in a small bowl; whisk to blend. Add in the butter pieces and cut into the dry ingredients with a pastry blender or two forks until the mixture is coarse and crumbly (it's going to be tempting, but do not heat the butter. The cold butter adds the crumbles and melts in the oven). Transfer to the refrigerator until ready to use.

To assemble the muffins, fill each muffin well with a small amount of batter, just enough to cover the bottom of the liner (1-2 tablespoons). Slice the log of cream cheese filling into 24 equal pieces. Place a slice of the cream cheese mixture into each muffin well. Divide the remaining batter among the muffin cups, placing on top of the cream cheese to cover completely. Sprinkle a small amount of the topping mixture over each of the muffin wells.

Bake for 20-25 minutes. Transfer to a wire rack and let cool completely before serving. (It may be hard to resist immediate consumption, but the cream cheese filling gets very hot!)

Monday, August 30, 2010

Afternoon Arugula Salad

I never really had the intention of posting meals that I have throughout the course of my day, but I feel so strongly about this salad that I need everyone to know about it!

My love for arugula has grown over the past few months, and I've created this salad around that love. This salad is almost too easy to make and can be switched up to suit your individual taste pallet.


All you need is:
  • Arugula (I like this leaf because it has a distinct taste and goes great with the other ingredients)
  • Craisins (If you haven't had these yet, try them. You will love them)
  • Walnuts (Because everyone loves nuts in their salad)
  • Cheese (I usually use fresh mozzarella, but today I had leftover goat cheese so I used that, and feta works just as well!)

Optional:

Red Onion
Cucumber
Croutons
Olives? (I'm not a fan, but if you like them, more power to ya)

I never measure out the ingredients for this salad. I feel that the amounts of each you use depends on how much you like each ingredient. So just start tossing some of each on a plate, you'll know when enough is enough :)

Dress it up


Because this salad is so refreshing and light, I never like to use a heavy, creamy dressing. I usually use oil and vinegar, but I ran out of vinegar, so I replaced it with this awesome balsamic I had in the cabinet. It's actually a Vanilla Fig Balsamic, and I suggest everyone go out and buy it now! I know it may sound odd to some people, but I actually got this at Marshalls for $5.99. My uncle, a restaurant owner in Florida, told me to buy it, and I am so glad I did. The flavor of this balsamic is sweet with a little bite to it. Paired with oil to calm it down a bit, it's perfect over this salad.

So there you have it, my favorite salad of all time. I hope everyone likes it just as much as I do! Enjoy!

Thursday, July 1, 2010

Fourth of July Buttermilk Pie

This morning, on my hunt for a recipe on how to poach eggs (a low-calorie, no fat added breakfast), I came across the blog “Simply Recipes” by Elise Bauer. While I found a delicious, simple, and illustrated recipe on how to poach the perfect egg, I also found that her blog is full of recipes for every meal, occasion, and taste bud. Voted “Best Food Blog Overall” in the 2006 Food Blog Awards , I think this woman knows what she’s taking about!

So as I was browsing her recent blogs and recipes, I came across the second recipe from Elise that I will be trying (the first being the poached eggs): Fourth of July Buttermilk Pie.

I automatically thought of the fresh blueberries I bought at a local farm market the other day. A perfect mixture of sweet buttermilk, whipped cream, fresh fruit, and a crunchy crust; how could you go wrong with this?!

I image it being paired perfectly with a nice, chilled glass of Champagne. Cool and refreshing after a hearty burger on a Sunday afternoon.

Ingredients

  • 4 eggs
  • 1 cup white sugar
  • 1 teaspoon lemon zest
  • 1 Tbsp flour
  • 1/4 cup butter, melted (half a stick)
  • 1 cup buttermilk
  • 1 teaspoon vanilla extract
  • 1 unbaked 9-inch pie crust
  • 1 cup cold, heavy whipping cream
  • 20-30 raspberries (or half as many strawberries, halved)
  • A handful of blueberries

Method

1. Preheat oven to 325°F. In a mixing bowl, beat the eggs, then beat in the sugar and lemon zest until well combined. Beat in the flour and melted butter. Beat in the vanilla and buttermilk.

2. Pour filling batter into an uncooked pie shell (frozen is fine). Bake at 325°F for approximately 50 minutes, or until the center of the custard has just set (can still be a little wiggly). Remove from oven and let cool. The custard may puff up a bit in the oven; it will deflate as it cools.

3. Whip the chilled cream until it holds stiff peaks. Once the pie has cooled to room temperature, spread the whipping cream over the top of the pie. Arrange the raspberries and blueberries in a decorative pattern on top of the whipping cream.

Serve immediately or chill until ready to serve.

Makes 8 serving pieces.